"Here to Help" is a support column written especially for Formstack's awesome, loyal customers.
When most people think about online forms, they probably first think about single-page forms for providing contact information, purchasing products, or donating funds. But did you know there are some really great uses (and benefits!) for longer, multi-page forms as well?If you want to conduct a thorough research survey or gather detailed information on a job application, a multi-page form is the way to go. When you spread your survey or application questions across pages, you make completing the form seem less overwhelming. Plus, you can activate our Save and Resume feature, which allows respondents to save their completed answers and come back when they have more time.What does this mean for you? More responses! In our most recent Form Conversion Report, we found that form submission rates more than triple when fields are spread over multiple pages. So increasing the ease and convenience of filling out your form is a win for the user and you!Ready to get started? Below I’ll walk step-by-step through the process of creating multi-page forms for any need.
Step 1: Create a New Form
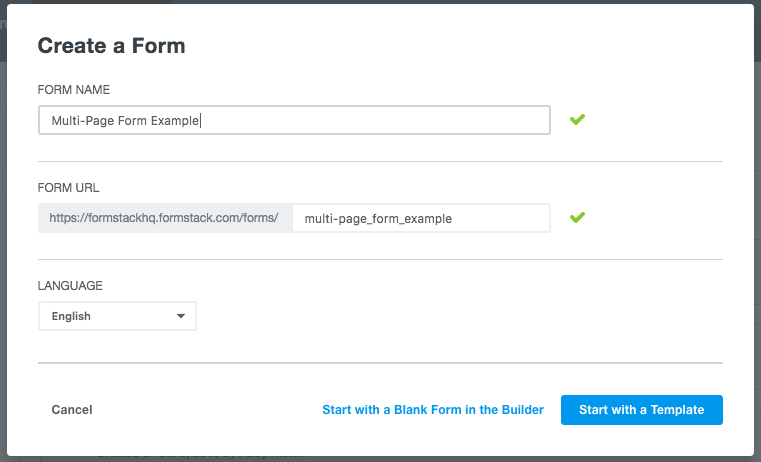
To build a multi-page form, you start out just as you would for a single-page form. Go into your Forms tab and click Create a New Form. Follow the prompts to name your form and start with a blank form in the builder.
Step 2: Add a Section for Each Page
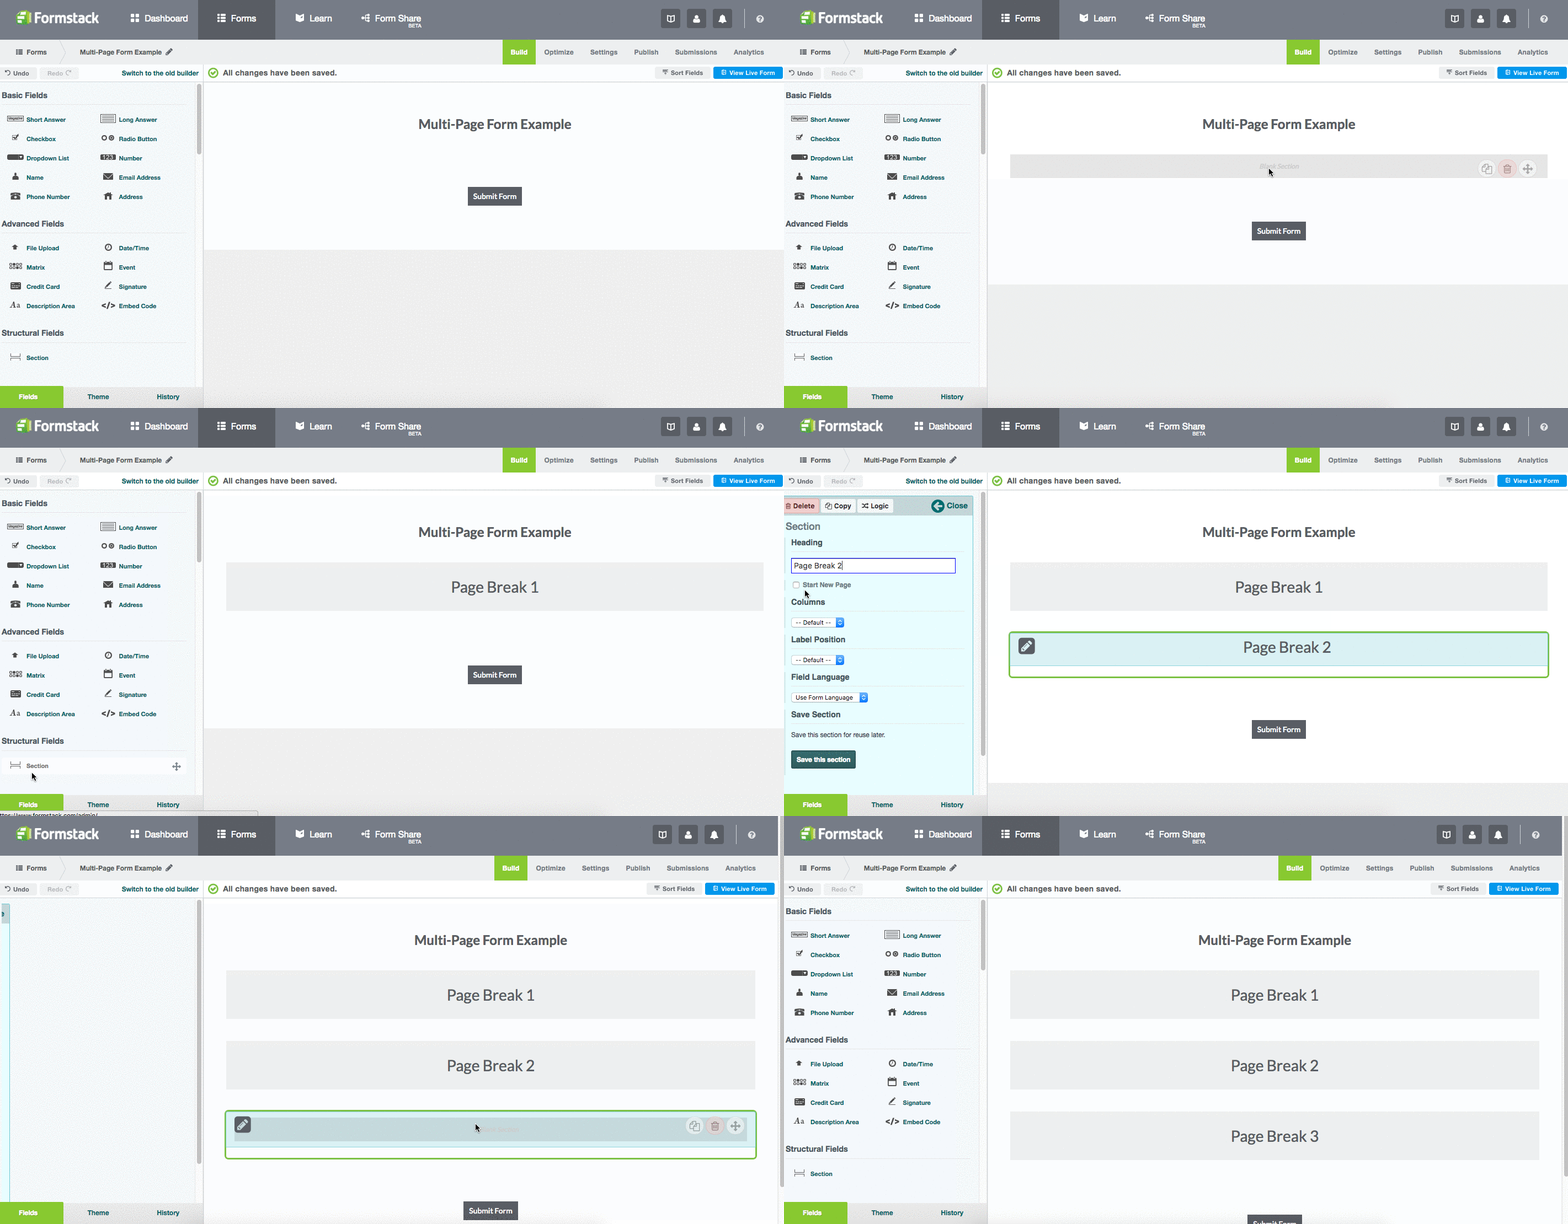
You can create multiple pages for your form by adding multiple Sections to your form. For each page you want your form to have beyond the initial page, simply drag and drop a new Section onto your form and select Start New Page in the options box on the left.
Step 3: Activate Save and Resume
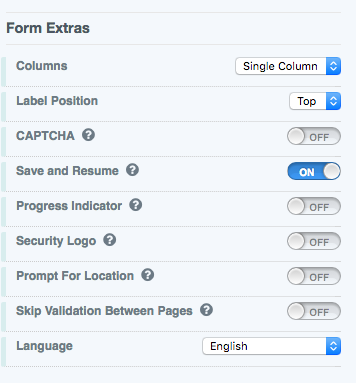
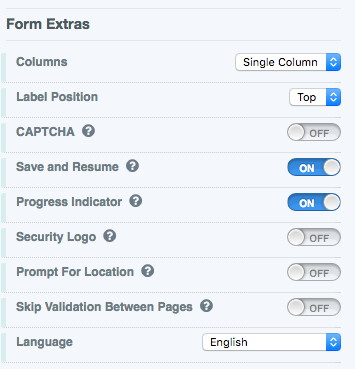
Once you’ve set your form up with multiple pages, you will have the option to activate Save and Resume. This feature adds convenience for users because it allows them to save a partially completed form and return to complete it at a later time.To activate Save and Resume, simply scroll to the Form Extras section at the bottom of the left sidebar, and toggle the Save and Resume option to ON.
When using Save and Resume, note the following:
- Files uploaded to the form and signatures completed by users will not be saved until the form is submitted to the database. Users should not upload files or sign forms until they are ready to submit.
- To resume filling out a form, respondents do not need a username or password. They will receive a direct link and have 30 days to finish their partially-completed form.
Step 4: Add a Progress Indicator Bar
If you’ve created a multi-page form, you will also have the option to add a Progress Indicator so users can see how close they are to finishing your form.To include a progress bar on your form, scroll down to the Form Extras section on the left side of the form builder, and toggle the Progress Indicator option to ON.
Step 5: Complete Your Form
Complete your form by adding fields under each section to fill in the multiple pages in your form. For example, if you are creating a multi-page job application, the first page could include a company overview and the job description. The second page could be for all the basic contact information. The third page could be for initial interview-esque questions to narrow the field. And the final page could be for uploading a resume and/or cover letter.
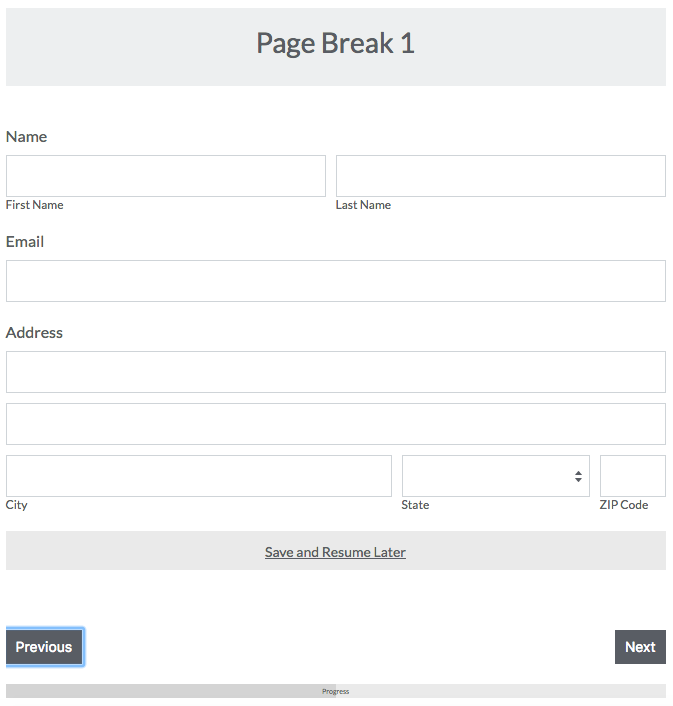
The completed form will show Previous and Next buttons at the bottom of appropriate pages, as well as a link for Save and Resume Later. It will also have a bar at the bottom to indicate completion progress.
Want to learn more about all you can do with our intuitive online form builder? Click here to explore our solutions for online forms.


